


项目介绍:
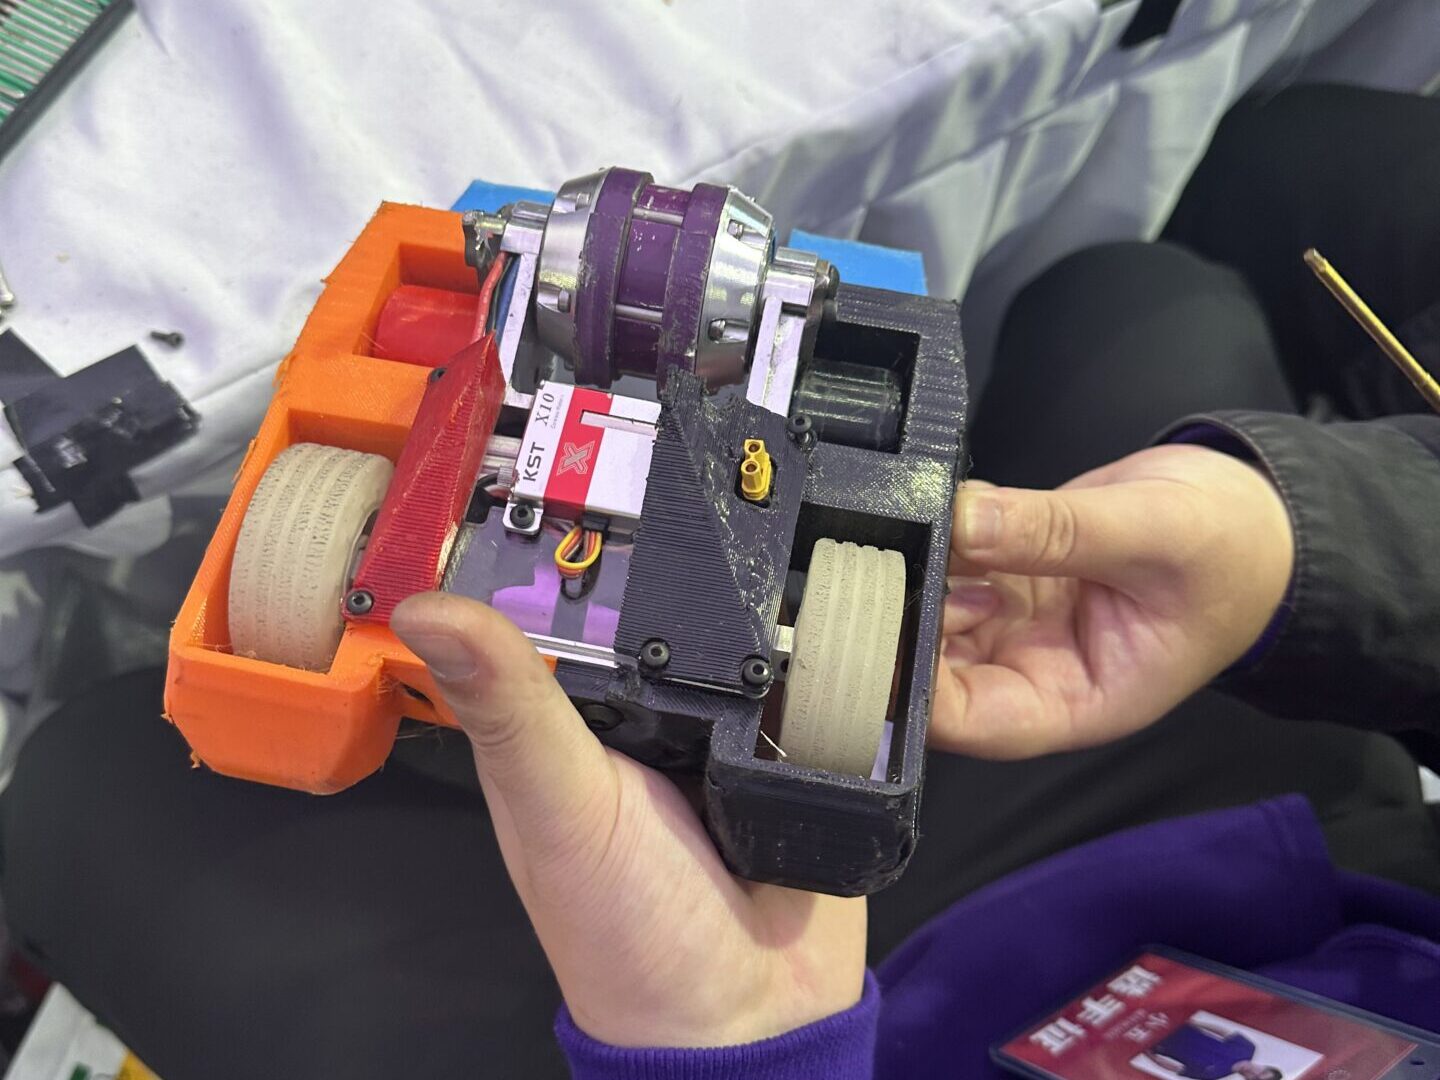
机器人格斗是一项竞技运动,参赛者按照比赛标准制作同等重量的机器人,在指定场地和限定时间内,使用除禁用手段外的任何技术进行对抗。

痛点:
传统格斗机器人主要由金属板或高密度聚乙烯(HDPE)材料制成,以确保机器人在激烈对抗中整体稳定。不同级别的比赛对机器人有不同要求,参赛者需要设计多台机器人,显著增加了设计和生产成本。此外,每场比赛都会消耗机器人的内部驱动电机等部件,缩短了机器人的使用寿命。因此,保护电机免受强烈冲击成为参赛者迫切需要解决的问题。

3D打印解决方案:
随着3D打印技术的快速发展,3D打印材料的范围不断扩大,柔性材料越来越多地被参赛者用于解决格斗比赛中电子元件的碰撞问题。此外,机器人格斗比赛通常按重量级别分为蚂蚁级、甲虫级和业余级,一些参赛者会根据比赛需求设计自己的机器人零件,然后选择合适的材料进行3D打印,以降低设计成本和减轻机器人重量。

选择Polymaker的原因:
Polymaker在基于材料挤出的3D打印领域拥有丰富的解决方案,享有良好声誉。其提供三种柔性打印材料:PolyFlex™ TPU90, PolyFlex™ TPU95, 和PolyFlex™ TPU95-HF. PolyFlex™ TPU95是一种适用于桌面级3D打印机的热塑性聚氨酯材料,肖氏硬度为95A,可拉伸至原长的3倍以上而不断裂。这种材料具有强大的层间结合力和柔韧性,能够使打印零件牢固地包裹和保护电子元件。与TPU90相比,在同类柔性材料中,它具有更高的硬度和更好的外部冲击吸收能力。此外,借助3D打印技术,通过模型设计和不同的填充密度,这种材料可以实现不同程度的弹性。这使得定制专属产品成为可能,并有效减轻机器人制造过程中的重量。总体而言,PolyFlex™ TPU95已成为机器人外部装甲的首选材料。


总结和展望:
未来,随着TPU95在机器人弹性装甲中的广泛应用,机器人格斗将迎来进一步的创新与发展。TPU95的柔韧性和层间附着力将有效保护机器人内部电子元件,延长其使用寿命。此外,3D打印技术的灵活性将使参赛者能够根据比赛要求定制机器人部件,降低设计成本并减轻机器人重量。创新与合作将继续作为我们的指导原则,让创作变得前所未有的简单。我们期待见证TPU95弹性装甲在未来机器人格斗领域带来的突破与进步。
我们的长期战略合作伙伴LulzBot发布了其TAZ系列桌面3D打印机的最新产品——TAZ SideKick。这款打印机有两种尺寸可供选择,其设计可以灵活配置,以便客户根据自身需求定制机器。
LulzBot TAZ SideKick目前有两种规格,是迄今为止性价比最高的LulzBot打印机。这款高度可配置的机器可以让客户轻松打造一台功能齐全的个人桌面3D打印机。
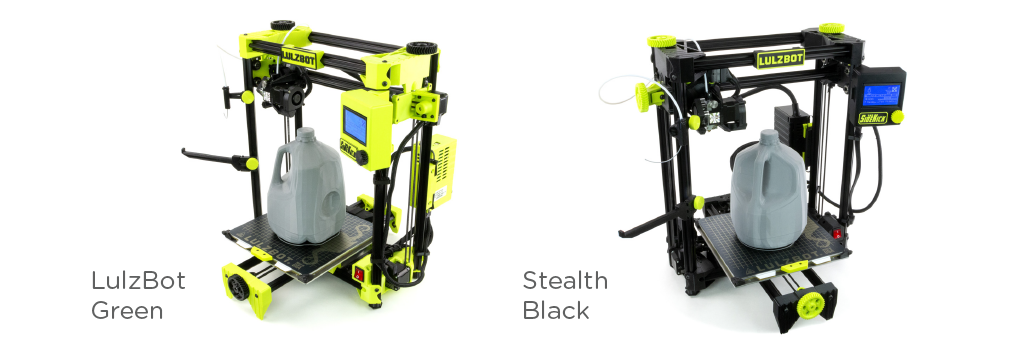
TAZ SideKick速度更快、操作更简单,开箱即可使用,配备免费软件。这款新打印机允许用户选择机器颜色和打印体积,还可以添加其他选项,如打印平台、电子元件以及任何LulzBot通用安装系统的打印头。
这款3D打印机最突出的特点之一是其“自我复制”的理念,让人想到最初的RepRap项目:在位于北达科他州法戈的不断扩大的LulzBot打印机工厂中,超过50%的打印机部件采用PolyLite™ PETG通过3D打印制成。
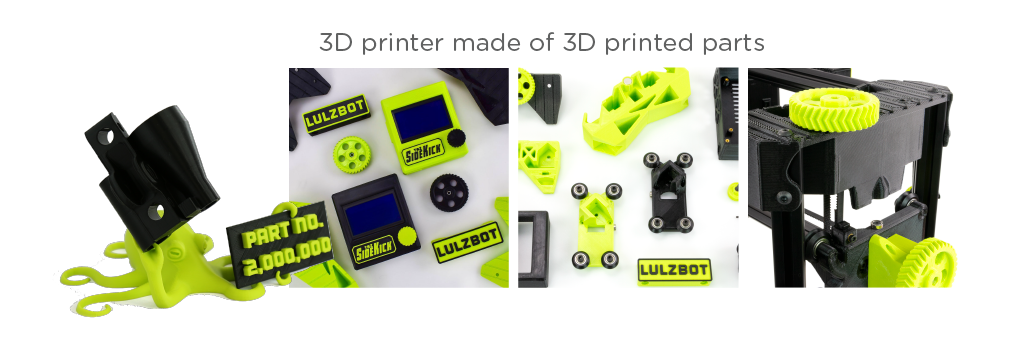
LulzBot高度认可开源精神,用户可以从LulzBot GitLab下载文件,便捷且低成本地更换任何磨损的打印机部件。LulzBot 3D打印机质量稳定,在美国北达科他州法戈制造,经久耐用。
TAZ SideKick订购信息
LulzBot TAZ SideKick现已开放订购。如需查看TAZ SideKick配置器,请访问 LulzBot.com/SideKick.
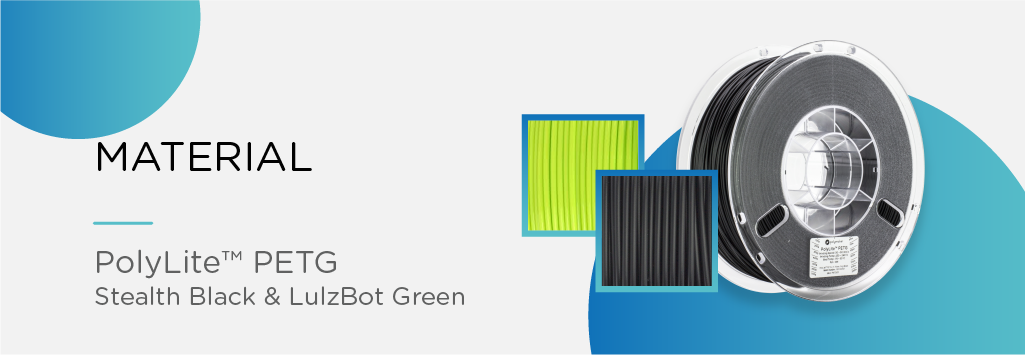
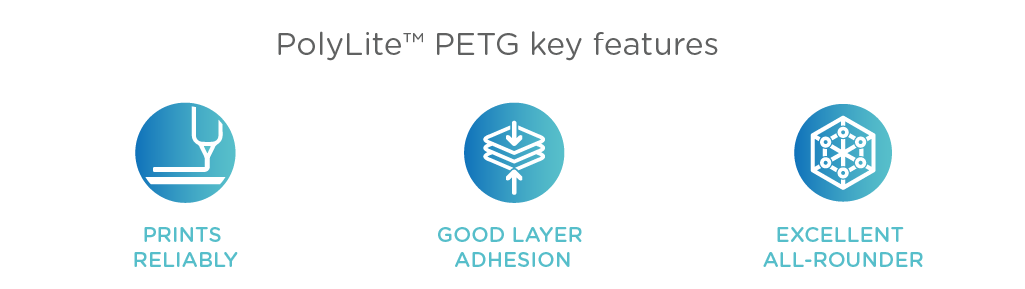
PolyLite™ PETG是一种高性价比的PETG线材,具有均衡的机械性能且易于打印。PolyLite™ PETG的打印难度与常规的PLA(PolyLite™ PLA)相当,同时具备比PLA高20℃的耐热性和更佳的耐用性。因此,PolyLite™ PETG适用于更多功能性应用场景——例如照明设备、振动部件或更多功能性产品设计原型。它是打印TAZ SideKick功能部件的理想选择。
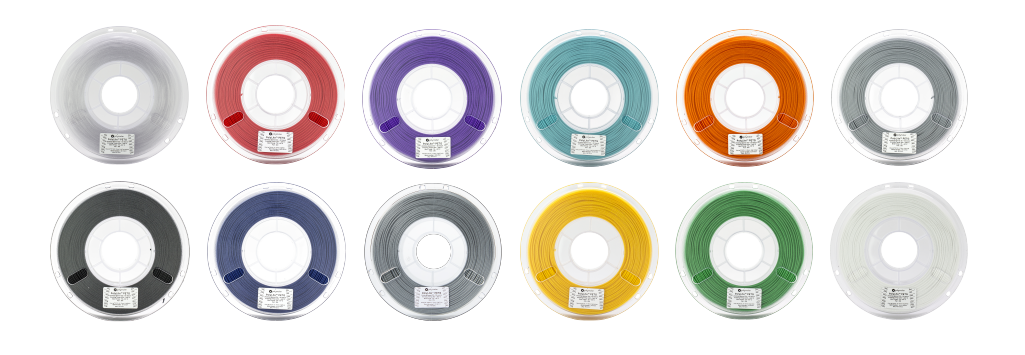
PolyLite™ PETG产品包括12种颜色的1千克线材,有两种直径(1.75毫米和2.85毫米)可供选择。PolyLite™ PETG可通过以下渠道购买:

Polymaker rises to the top to take home the Creative Application Award at this year's TCT360 exhibition in Birmingham, UK. The LEGO Go-Kart created by Matt Denton in partnership with Polymaker impressed this year's judges and was a crowd favourite at the award ceremony, gaining lots of cheers even before the winner was announced. The Creative Application Finalist selection was filled with some fierce competition such as: Stratasys, BMW, Shapeways, Ricoh 3D and Gravity Industries among many other impressive projects.
 Polymaker win 2022 Creative Application Award
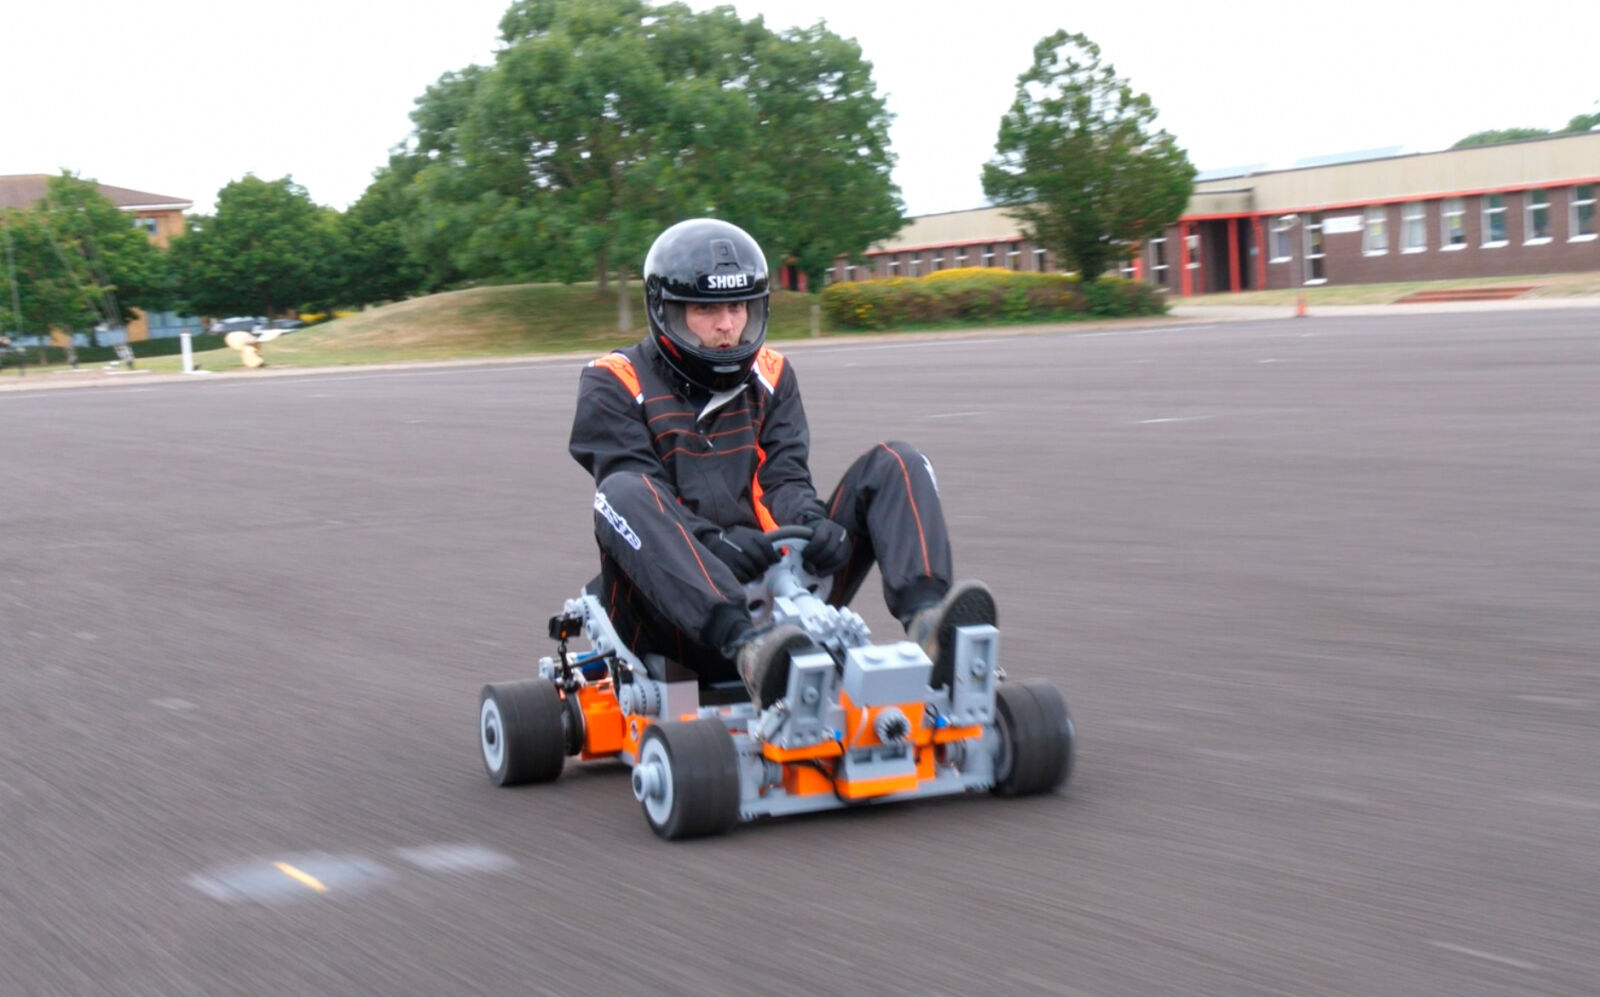
The first fully-electric ridable giant LEGO Go-Kart from Matt Denton. Scaled up 3D printed LEGO blocks printed on desktop FFF printers assembled into a fully working electric Go- Kart.
While the aesthetics of the Go-Kart are inspired by the LEGO Technics kits #1972 released in 1985. It was the electrification that created a challenge that required an original solution to a design that was not intended for human transportation. The use of desktop 3D printing enabled Matt to print all the bricks needed to assemble the Go-Kart with only a few non-3D printed parts, such as motors, brakes, and electronics. The end result is something that looks like it shouldn't drive, but when it does it's guaranteed to put a smile on your face.
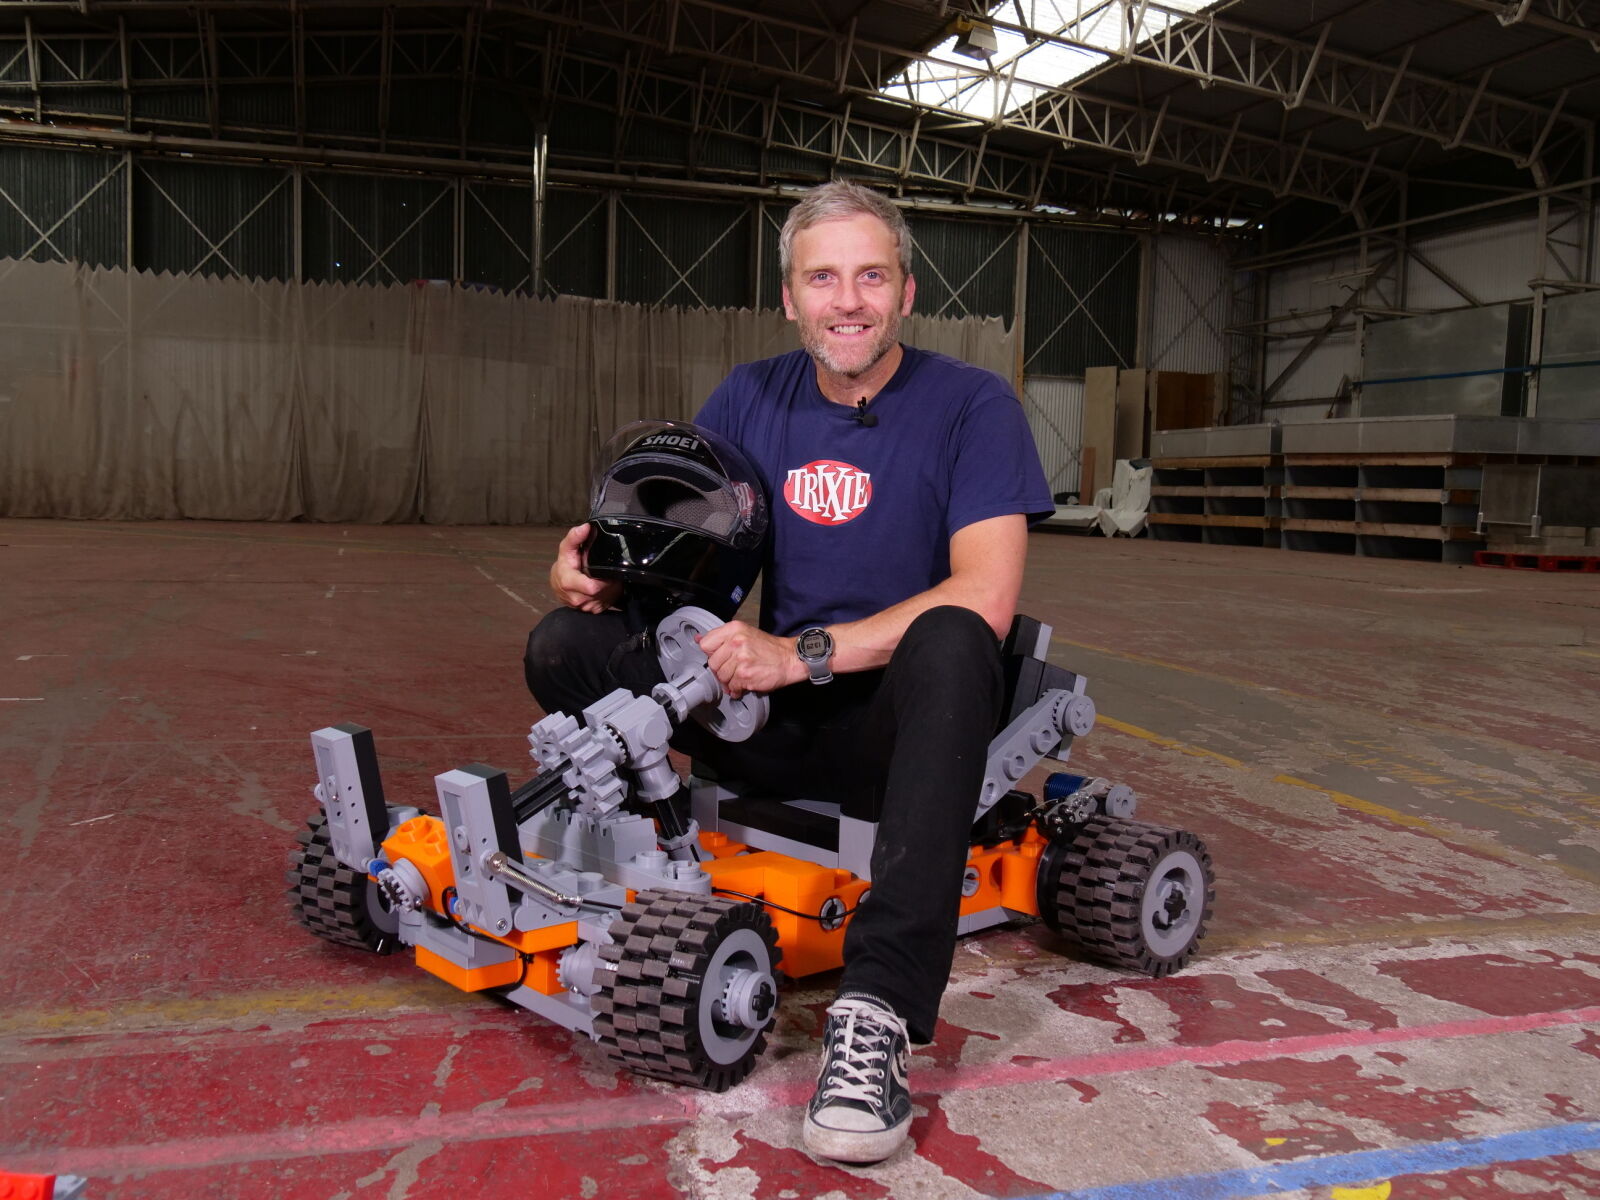 Matt Denton and the LEGO Go-Kart
The realisation that a fully functional Go-Kart can be 3D printed on your desktop and assembled with parts you can buy online will inspire people to think inside the blocks. Creativity can be applied to old concepts the same as new.
Absolutely everyone loves it, Matt has brought a childhood toy to life like something out of a pixar movie. Even the folks at LEGO spoke to Matt saying they love what he's doing. Matt displayed the Go-Kart on the Polymaker booth at FormNext 2021, the crowd response has been overwhelmingly positive with many people stopping to take pictures and ask Matt questions. Matt's YouTube videos have gained over 1.8 million views related to the Go-Kart project.
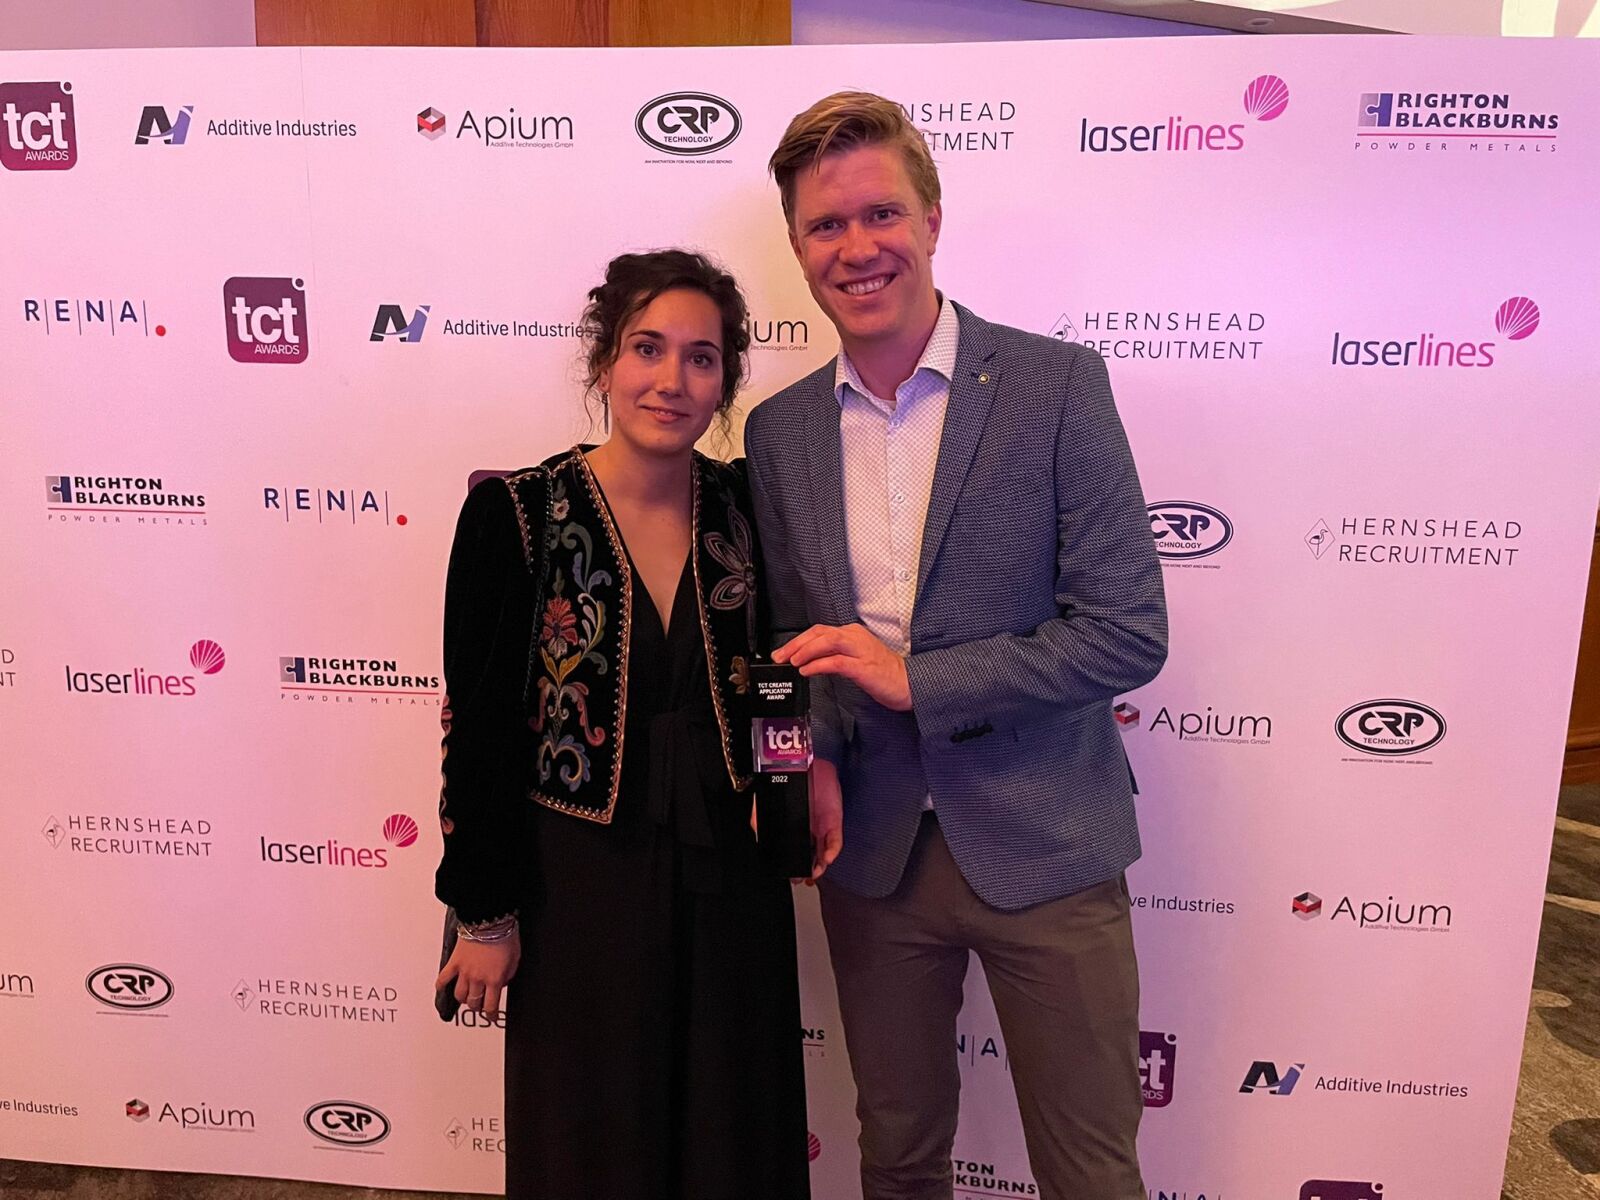 Sjoerd & Gisela collect the Creative Application Award at the TCT award ceremony
All materials for the Go-Kart were supplied by Polymaker. Matt choose a wide range of filaments as the material needs differed from brick to brick. The chassis bricks were printed in PolyMax™ Tough PLA, the gears in PolyMax™ Tough PETG, the axles in PolyMax™ Tough PC, the tyres in PolyFlex™ TPU95. Finally, PolyLite™ PLA was used for some cosmetics parts. The combination of materials allowed Matt to take advantage of the mechanical properties of a wide range of filaments which were all compatible with his desktop printing setup.
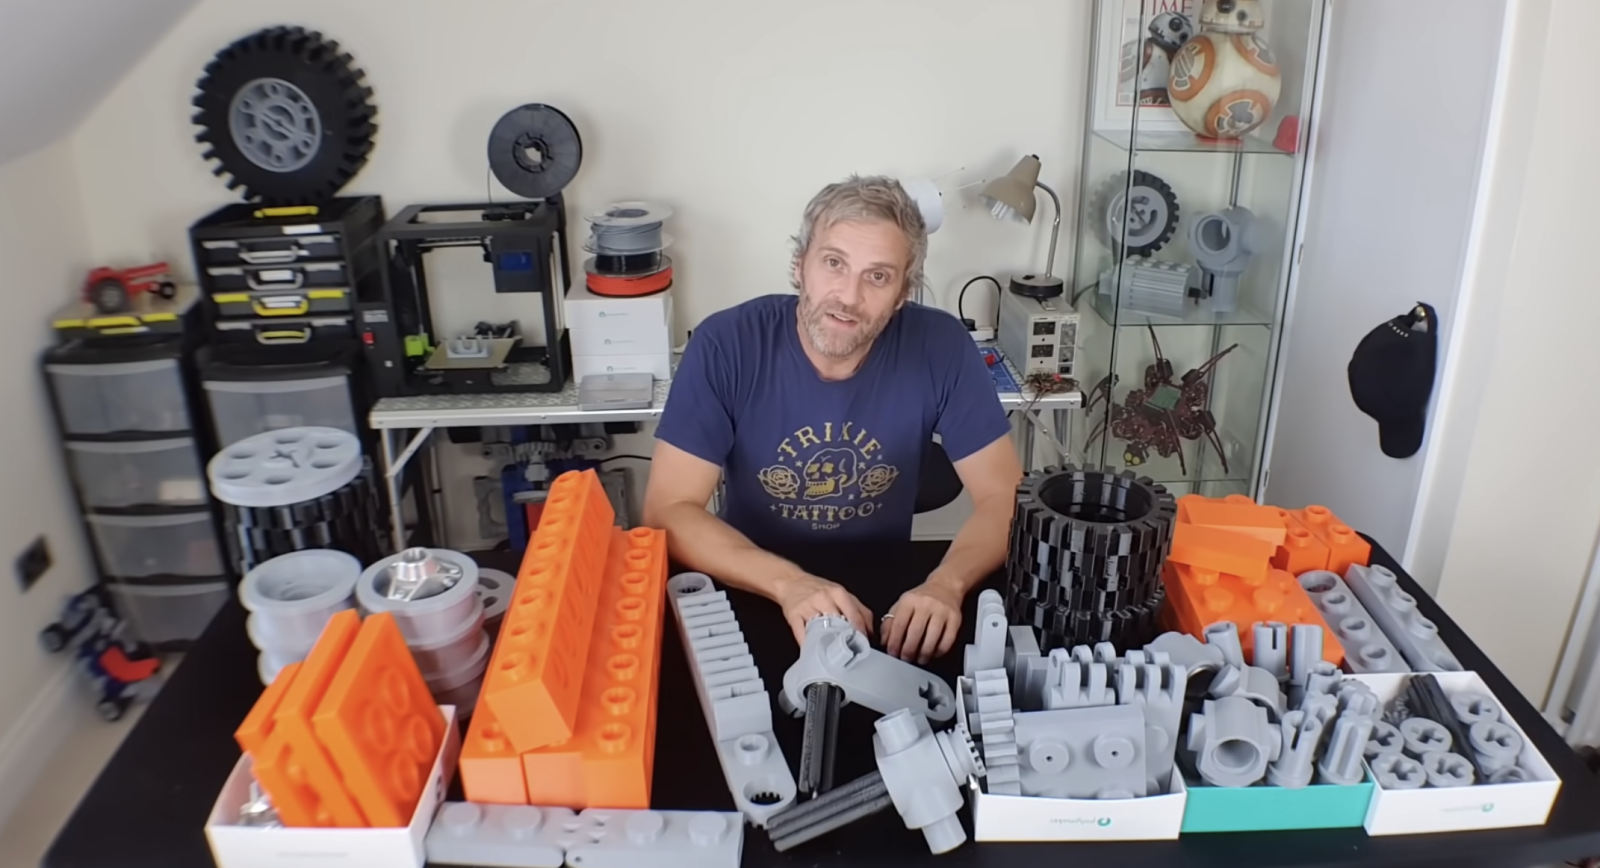 Matt with all the 3D printed LEGO bricks
3D printing is the only way to create this Go-Kart. Even if you paid the ludicrous amount of money for the tooling of these giant blocks, a solid injection moulded brick would be too heavy. 3D printing allowed Matt to have a number of slight variations to the bricks so that they could hide bearings or route cables without spoiling the aesthetic. With a desktop 3D printer over 95% of all the parts were printed at home by Matt on a 300mm x 300mm x 300mm print bed.
Electric vehicles are the way forward as we reduce our carbon emissions. Showing people that they can print their own vehicles at home reduces heavy emitting big industry and localizes manufacturing. This, in turn, eliminates the need to ship products around the globe further reducing emissions. 3D printing gives the ability to manufacture locally and this project is a great example of what can be achieved with inexpensive desktop 3D printers at home in your bedroom.
The classic design touches a special place in our younger hearts, reminding us of a simpler time when our creativity could run free. Everyone who played with LEGO when they were a child is instantly reminded of the familiarity of this project. A large scale model on its own would still invoke this feeling, but the fact that this isn't just a model, its a rideable electric vehicle which adds even more charm to the project.
Just as the original technics kit from 1985 inspired Matt to take up engineering. He now hopes that this new generation armed with 3D printers can realize their potential by following in Matt's footsteps. The ability to design and customize parts enabled Matt to create the Go-Kart without spoiling the LEGO aesthetic. Matt's videos break down the individual parts and he explains the design choices he made. With over 20 years working in the special effects industry for TV & Film, Matt's experience paired with a fun project provides an engaging educational and problem-solving demonstration.
Matt has already posted his next video which involves some PolyMax™ PC drifting sleeves. The 3D printed sleeves will fit over the rear tyres greatly reducing the grip that the PolyFlex™ TPU95 provides, instead, the rear wheels can spin with less friction allowing Matt to drift the Go-Kart around.
Matt will reprint the PolyMax™ PETG gears to give a higher speed ratio necessary for drifting.
 Wear Damage on the PolyMax™ PC drifting sleeves after intense usePoly

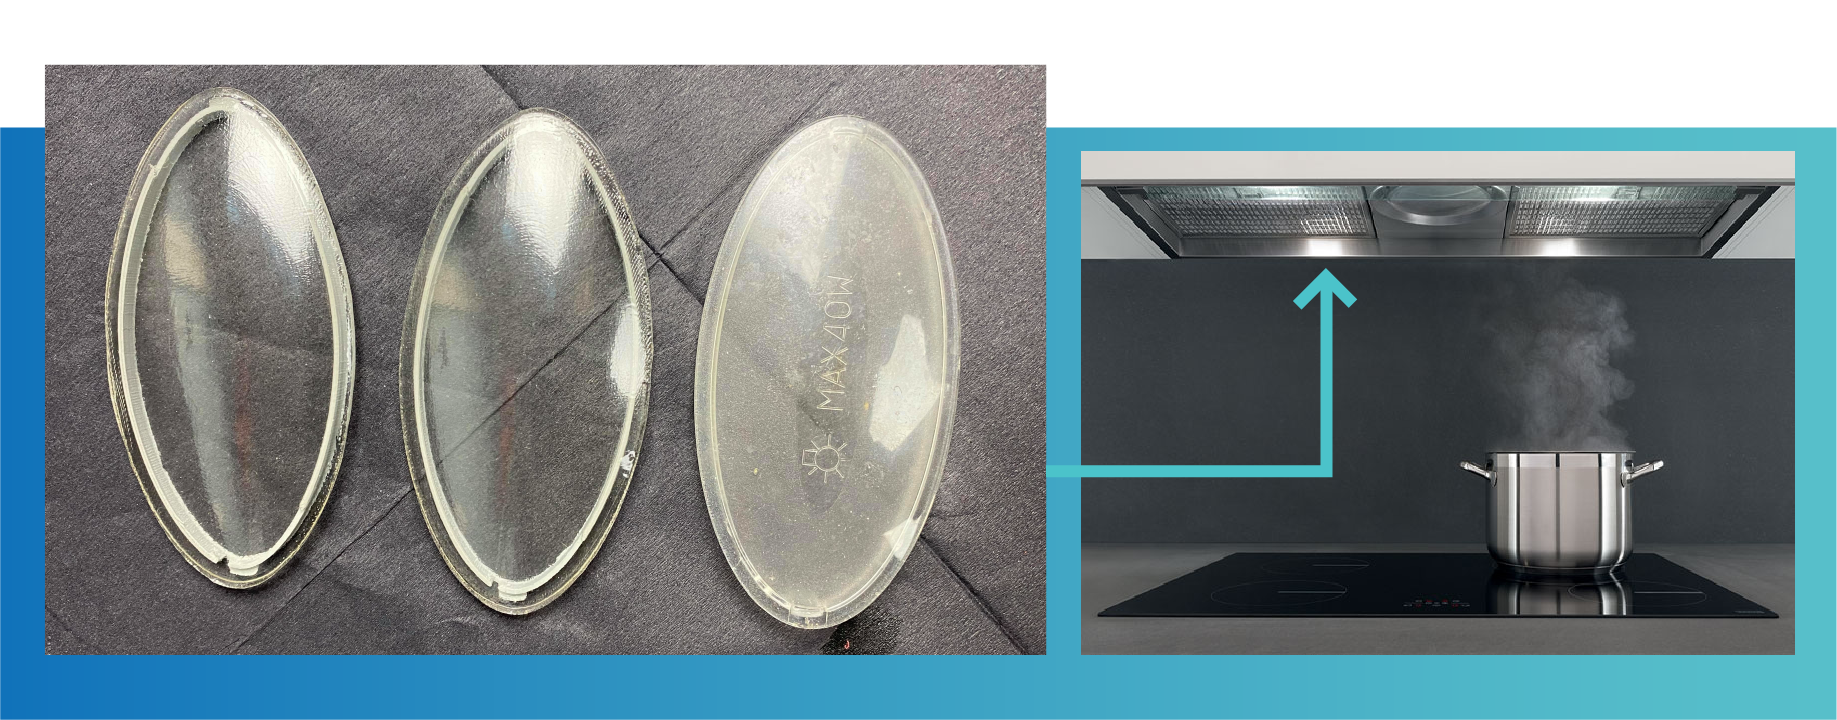
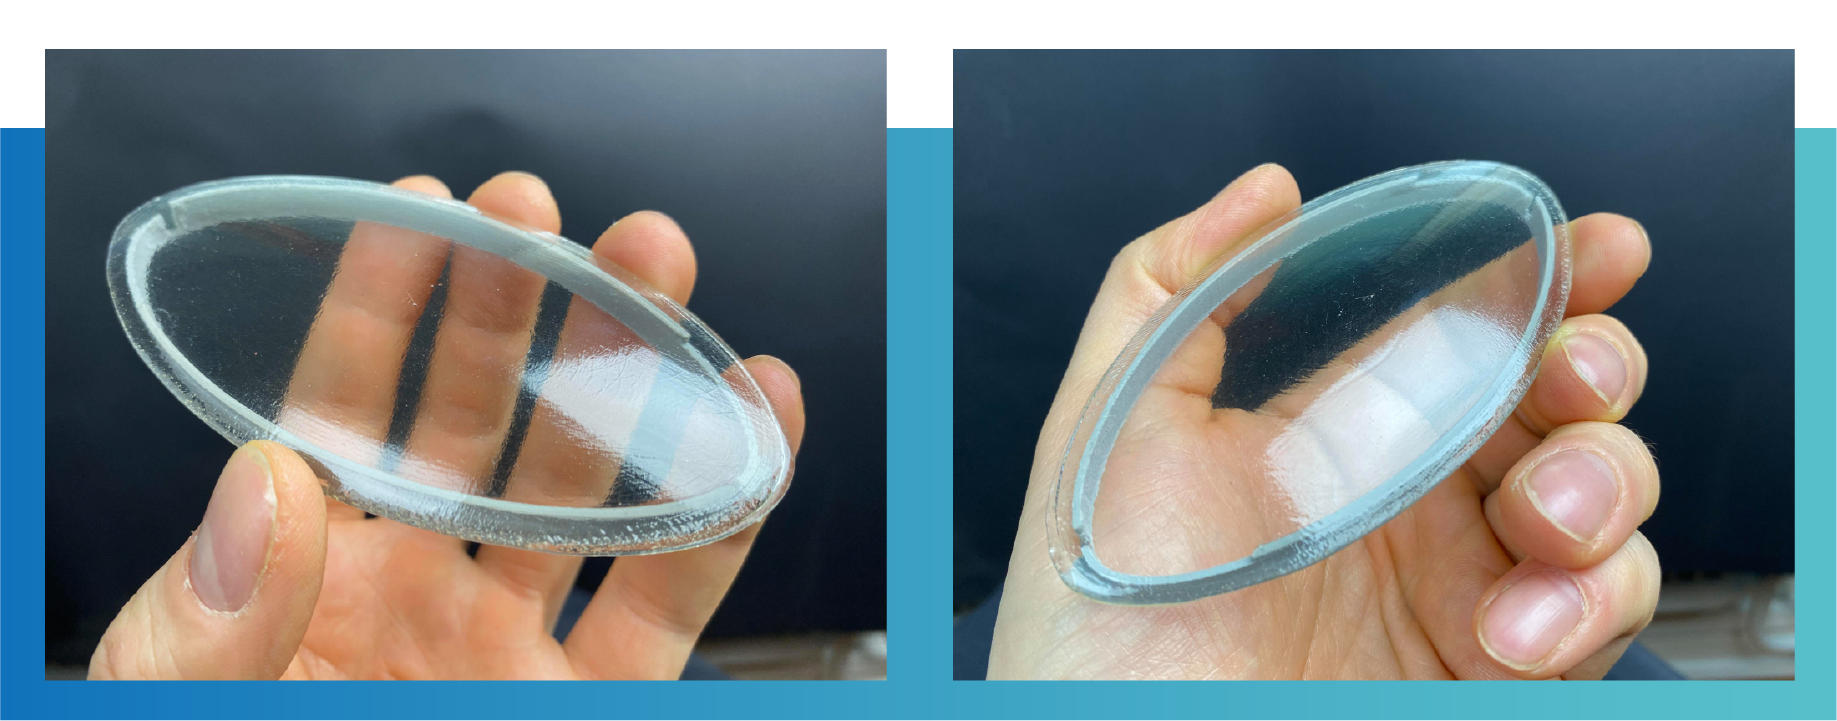
Perfectly clear 3D printed parts are possible with PolySmooth™ and here is the story of one of our customers. Mattias has shared with us his process creating a pair of lenses for the kitchen fan lights.
From: Mattias Lundberg
July 22nd 2021
I made a thing! well, two actually. I needed to fix something in my home and like so many times before I resorted to 3d printing and my favourite filament Polysmooth. Hi, My name is Mattias Lundberg and I love 3D printing. I´ve been doing this as a hobbyist for 6 years now and love to make the impossible possible and to push the limits just to be able to hold the printed part in my hand or see it functioning the
way it was intended.
My task at hand this time was the light covers on my kitchen fan. Originally the lamps were very hot so my first attempt three years ago was with a super clear heat resistant material that...melted. But I realised that after all these years the original lights had been phased out to LEDs. THEY dont produce heat! Bingo! Lets try Polysmooth transparent!
The object this time is a simple yet complex shape that had to be separated into the lens as one part and the frame with clips as the other. The frame with flexible clips had to be printed separately with a 0.4 nozzle while the lens must be printed with a thicker nozzle and only as a single perimeter wall.
This products really is made for resin printing but when you are hell bent to make it with an FDM printer that's what you gotta do right.
Something really important in order to reach success is to know not only your personal limitations but also the slicers, printers and the filaments limitations and roll with it and use them to your advantage. In short, trick the printer and filament in doing what you want it to.
I tried many different orientations and techniques and had a lot of failed prints and semi good results until I found the way!
This is a round bulgy object, it needs to stand on its edge, have low layer height and around 190 degrees nozzle temp. And printed in vase mode or spiralized as its called in Cura.
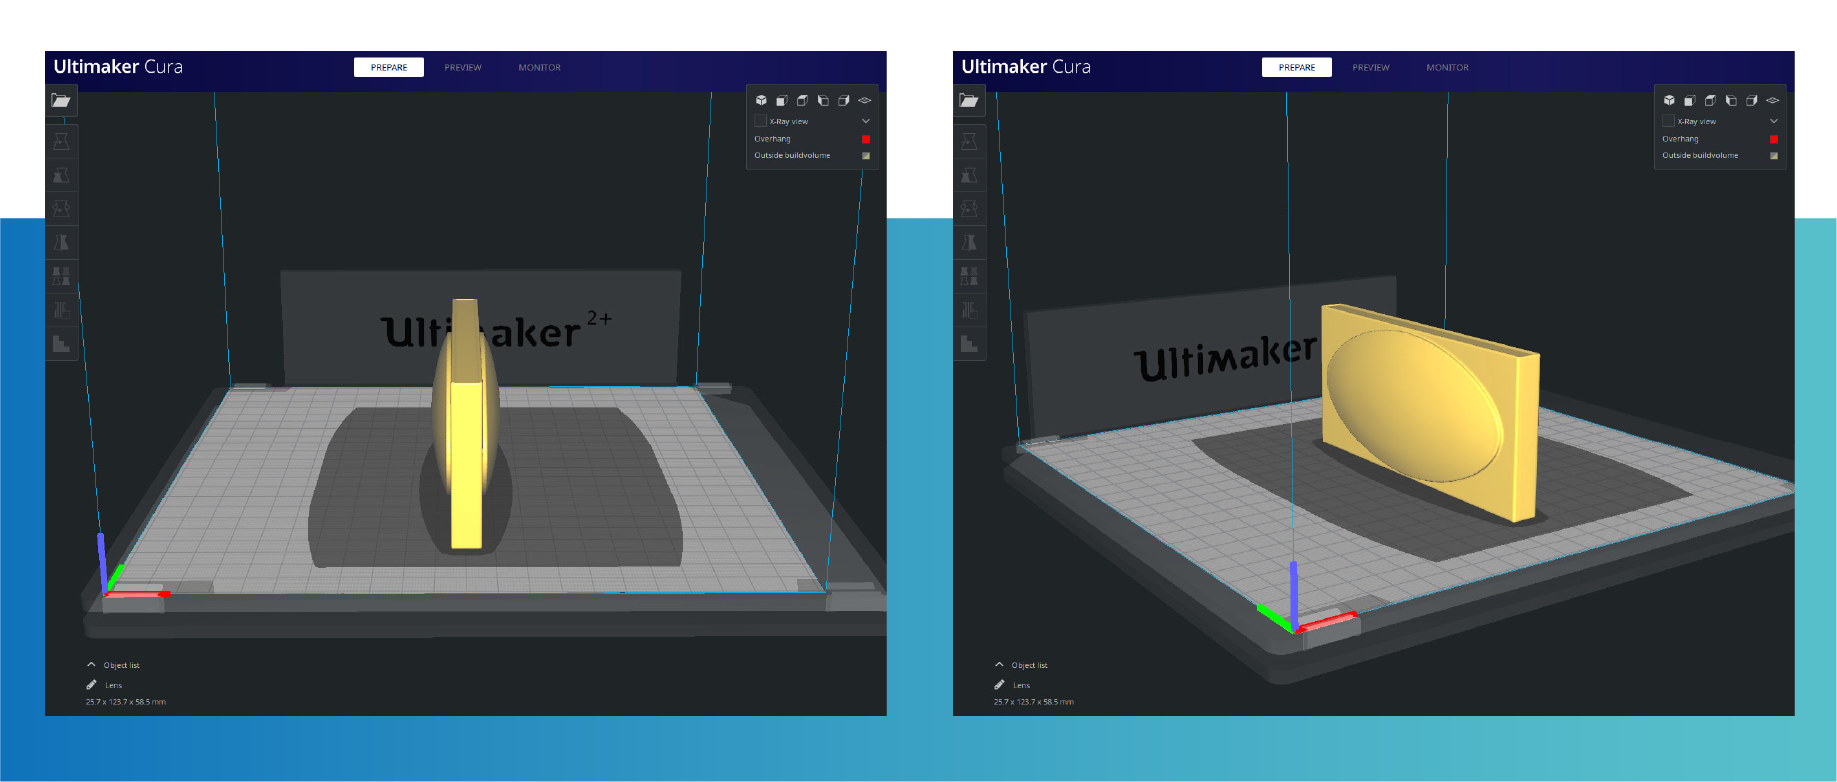
Therefore I made a single perimeter box with the lenses bulging out on the longer sides and printed it really thick (2 mm) to make it look like the original piece. This way the nozzle could go round and round printing both lenses without any disturbances.
Next step was to simply cut it out of the box walls and treat it with 100% Isopropanol, let it dry and sand it before final IPA treatment and done! I was holding two perfectly shaped, very clear and sturdy lens shaped covers in my hand. The frame was glued on and the whole piece was snapped into place and I know its gonna last a long long time. Thank you Polymaker.
Check out Mattias post and video of the prints on facebook:
https://www.facebook.com/groups/polymaker/posts/2728308607433197/
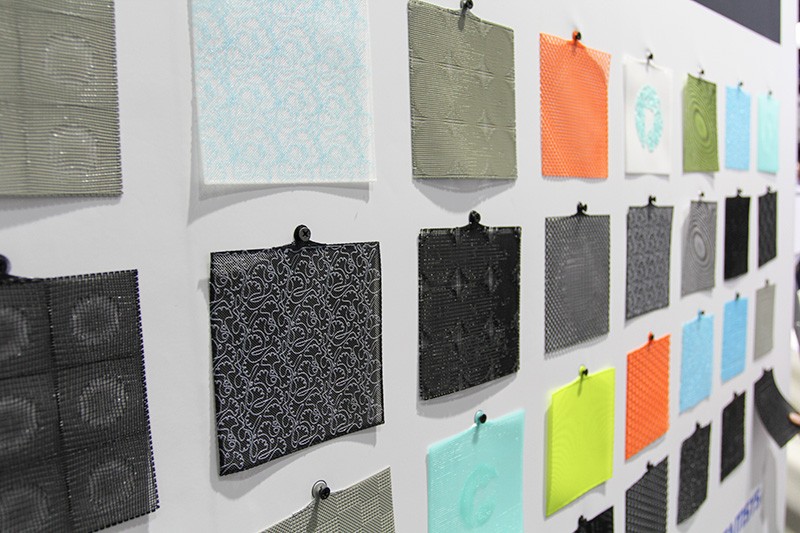
July 8, 2020- On the first day of the TCT Asia exhibition in Shanghai, Polymaker and Covestro are jointly promoting their latest application - 3D printed fabric.
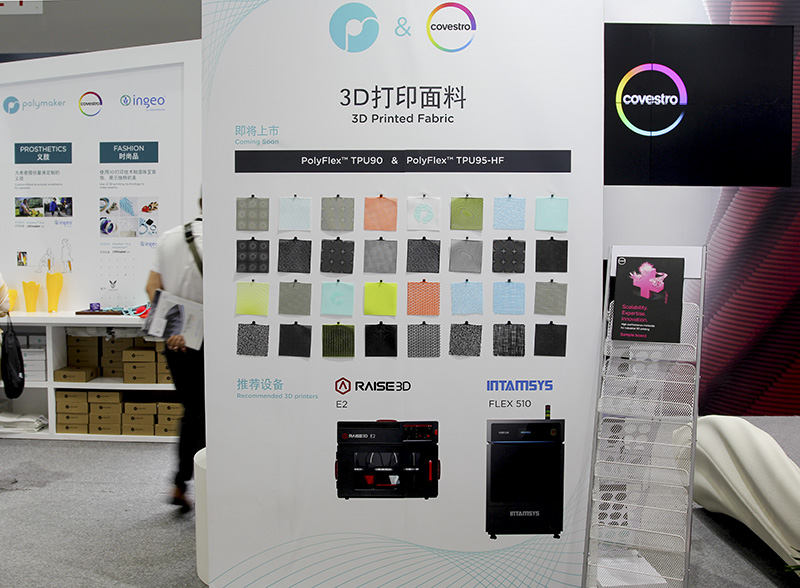
Covestro and Polymaker have been in partnership for years to promote high-performance 3D printing materials and to develop new 3D printing applications. This time, Covestro and Polymaker have jointly developed a new processing technology with the industry's top 3D printer manufacturers INTAMSYS and Raise3D to improve mass production and efficiency of 3D printed fabrics. The INTAMSYS FLEX 510 printer and Raise3D E2 printer are highly adapted for printing flexible materials which match the characteristics required for 3D printed fabric.
As 3D printing technology has been widely integrated into manufacturing, sport & leisure, medical and other fields. 3D printing is now offering new applications to the textile industry which offer both mass production alongside mass customization. 3D printing fabric may not only provide a more environmentally friendly solution, but also offers a new manufacturing method to the centuries old weaving process.
The 3D printed fabric jointly developed by Covestro and Polymaker takes a new approach to fabric manufacture by utilizing 3D printing to create a 2D fabric. This has more practical value other than waste reduction and can create patterns and style with use of computer algorithms. The 2D fabrics are then integrated into the existing workflow to create a customized 3D object such as: hats, shoes, bags, scarves, gloves and other clothing accessories.
Compared with traditional fabrics, 3D printing fabrics have many advantages, such as:
- Flexible production process with both mass production and customized production
Taking the production of 3D printed shoe uppers as an example, a complete upper could be printed in 30 minutes. A single 3D printer could produce 48 uppers 24 hours a day. And due to the characteristics of 3D printing technology, the design of each shoe upper produced in theory can be completely different. So, 30 devices could produce more than 10,000 fully customized uppers in a week.
Customization and mass production of 3D printed fabrics could go hand in hand for the first time.
- Unique textures and patterns
Relying on 3D printing technology, it is possible to make textures and patterns that are difficult to produce with traditional production methods, such as moiré, shape changes, and density gradient effects.
For this unique advantage, Polymaker has developed a software for the designing and slicing of 3D printing fabric.
- Digital design and automated production
The design of the 3D printed fabric can be fully digitized. Using the software developed by Polymaker, design styles such as shape change, density gradient, and random lines can be achieved through algorithms. While the design freedom is greatly improved, 3D printing technology can also be able to produce these complex styles.
The production process of 3D printing fabrics can all be handed over to 3D printers to achieve 24-hour automated production, without human intervention in the printing production process.
- Programmable property
In order to meet different elasticity, strength, and hardness requirements, in addition to the performance of the material itself, the texture design and printing method of the fabric also have a critical impact. Polymaker and Covestro have explored and developed valuable methods and experience in this regard using algorithms to generate organic texture where strength is needed while allowing more breathability in areas of less stress. This allows designers to optimize their fabric and create tailored 2D patterns in the most lightweight and efficient way, in high-stress applications such as the printing of running shoe patterns this advantage becomes obvious, where lower stress fabrics can make use of the aesthetic advantages.
In the selection of materials for the development of 3D printing fabrics, Polymaker cooperated with Covestro to select from the many varieties of TPU for 3D printing development. TPU (Thermoplastic polyurethanes) is a thermoplastic polyurethane elastomer, which has a wide range of hardness, wear resistance, oil resistance, transparency, and good elasticity. It is widely used in daily necessities, sports goods, toys, decorative materials and other fields in traditional manufacture.
Covestro TPU materials are rich in variety and performance. In response to different elasticity, strength and hardness requirements, Polymaker selected the corresponding TPU raw materials, formulated the 3D printing technology modulation formula, and developed 3D printing materials. The 3D printing fabrics released this time include 90A and 95A, two hardness materials.
- Integrated design and production to reduce waste in the production process
Facing the important global issue of environmental protection, 3D printing may better reflect its advantages. The integrated design of 3D printing could reduce the waste in the production process, and even target zero waste. In addition, in the production process of 3D printing, no water is used, no water is wasted, and water is not polluted. Compared with traditional production methods, the advantages of environmental protection could be significant.
Polymaker and Covestro have joined forces to vigorously promote the application of 3D printing in the textile industry and help the transformation and upgrading of 3D printed fabrics from artwork to industrialization.
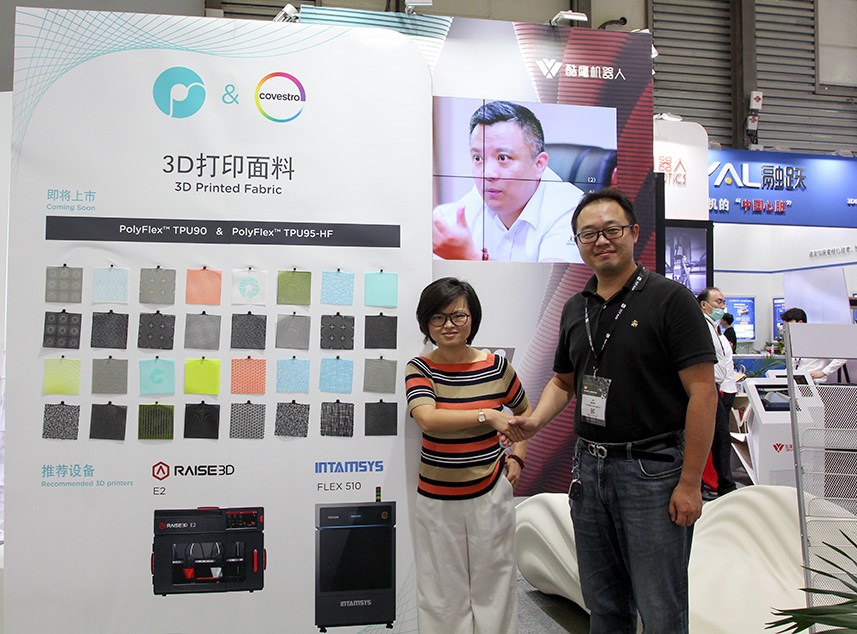
Covestro Business Development & Partnering APAC Yvonne Wang (left) and Polymaker VP Hang Qu (right)
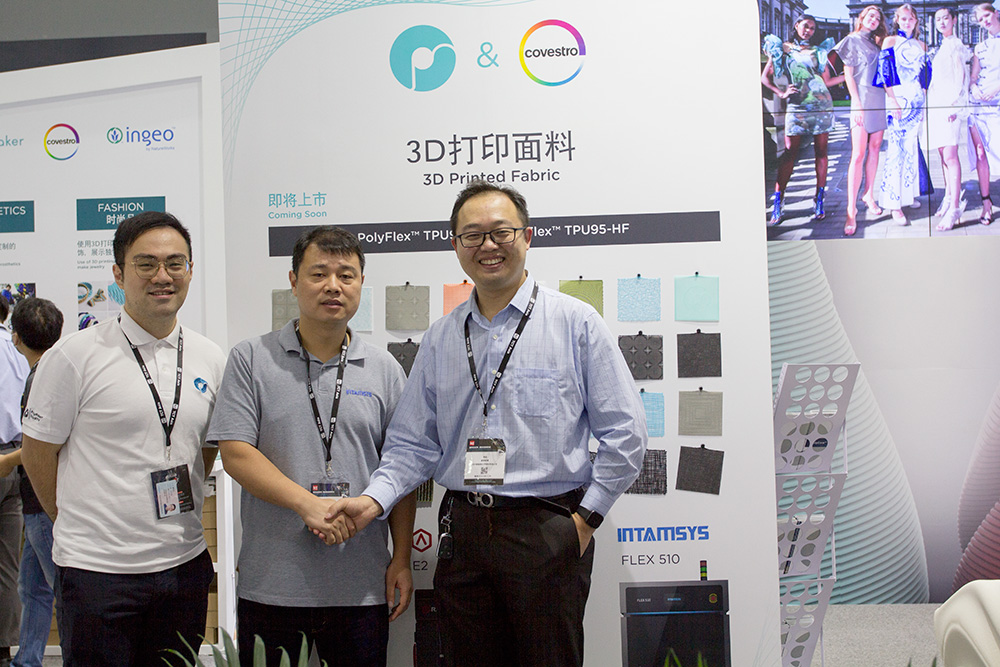
CEO of INTAMSYS Charles Han (middle), Polymaker VP Hang Qu (right) and Polymaker Strategic Business Development department senior manager Raymond Huang (left)
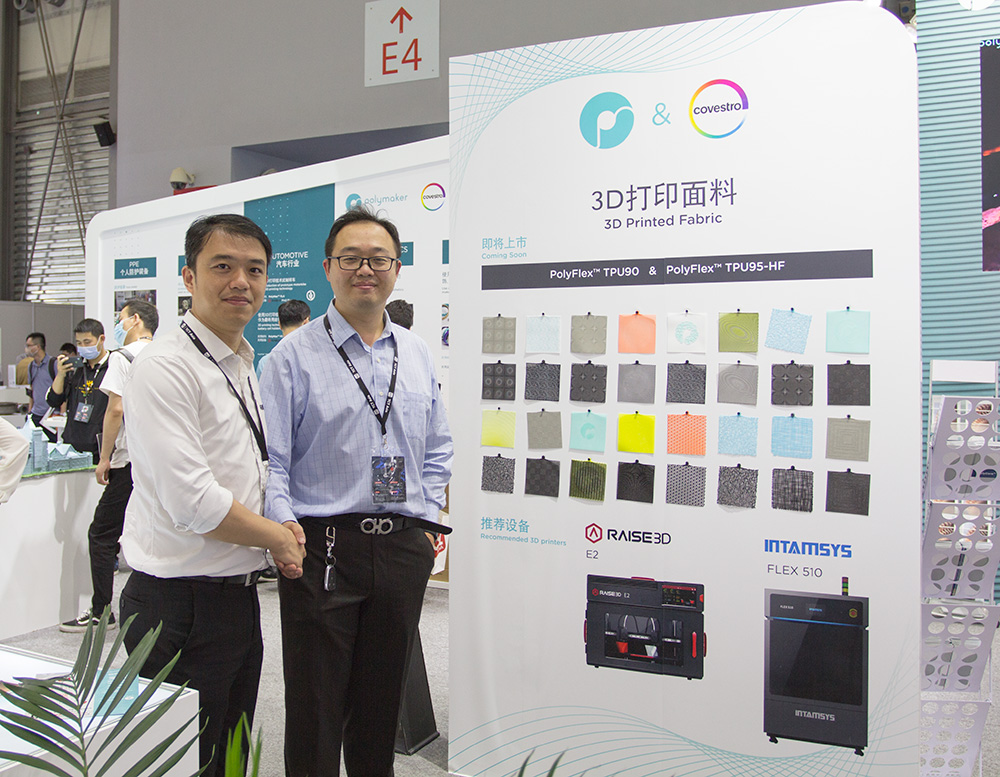
CEO of Raise3D Edward Feng (left) and Polymaker VP Hang Qu (right)
About Polymaker
Polymaker is a high-tech company specializing in 3D printing materials. It is committed to promoting 3D printing technology in various industries with leading technology, high-quality products and meticulous service. Polymaker products are widely used in automotive, aerospace, industrial manufacturing, medical, consumer and other fields by customers around the world.
About Covestro
With 2019 sales of EUR 12.4 billion, Covestro is among the world’s largest polymer companies. Business activities are focused on the manufacture of high-tech polymer materials and the development of innovative solutions for products used in many areas of daily life. The main segments served are the automotive, construction, wood processing and furniture, and electrical and electronics industries. Other sectors include sports and leisure, cosmetics, health and the chemical industry itself. Covestro has 30 production sites worldwide and employs approximately 17,200 people (calculated as full-time equivalents) at the end of 2019.
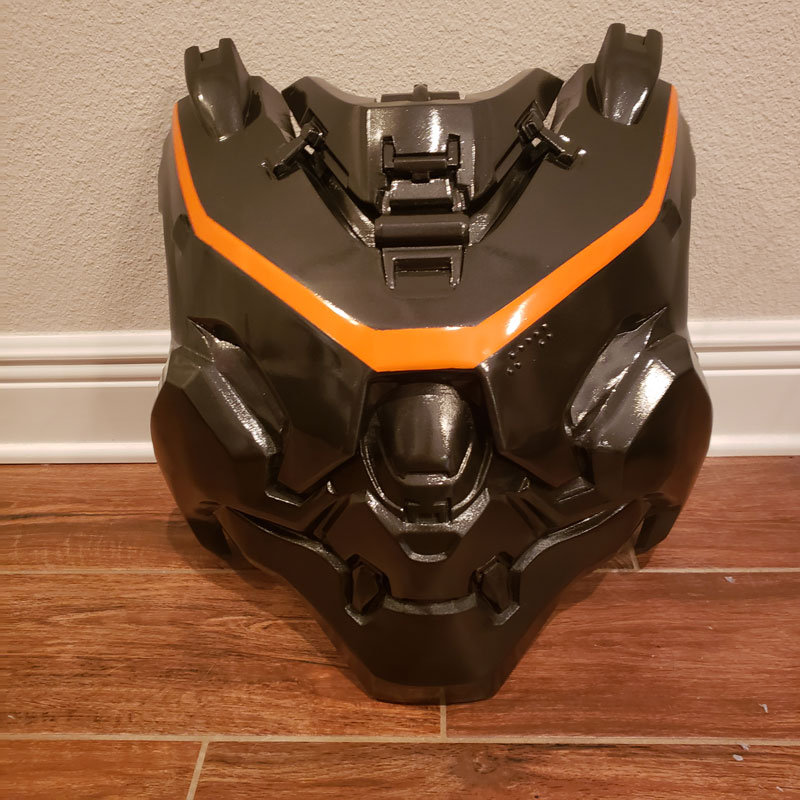
3D printing technology has become a preferred method for DIY persons, however, the model post-processing to remove layers, the bonding between different parts, painting and so on stay a challenge. A few weeks ago, we noticed an amazing Halo cosplay on social media, the costume was 3d printed using PolyLite™ PLA. This amazing work was done by Alpha to Zeta Industries, and we were very excited to contact them and ask if they would like to share their professional experience with us. We were glad to hear back from Anthony from Alpha to Zeta Industries, they kindly explained all the manufacturing process to achieve such results and were also happy to share it with our community.
If you are interested in cosplays or have challenges building your costumes, you can reach them on social media: Facebook or Instagram. If you are interested in Halo cosplay, you can also visit their group of Halo cosplayers on 405th.com. They have a lot of knowledge to share and are happy to assist new members.
Here is the reply from Anthony explaining how he post-processed his costume:
Hello,
Thank you for reaching out to us about working with Polylite PLA. We are big fans of the video game franchise Halo. And for about 3 years now we have been creating costumes from that franchise under our page, Alpha to Zeta Industries (on Instagram and Facebook). Our primary tool to create these costumes is our 3D printer, our Lulzbot Taz 6. Just recently we created a new version of our Spartan Recluse suit using Polylite PLA. To create this suit, we started with files from Halo 5 Guardians. From there we extensively reworked the models for 3D printing and added details. Once we were ready to print, we selected Polylite PLA due to the positive results we have had with it in the past. To describe the process, I will talk you through how we finished the chest armor. Picture 1 (Attached) is a picture of the raw 3D print fresh off the printer and assembled.
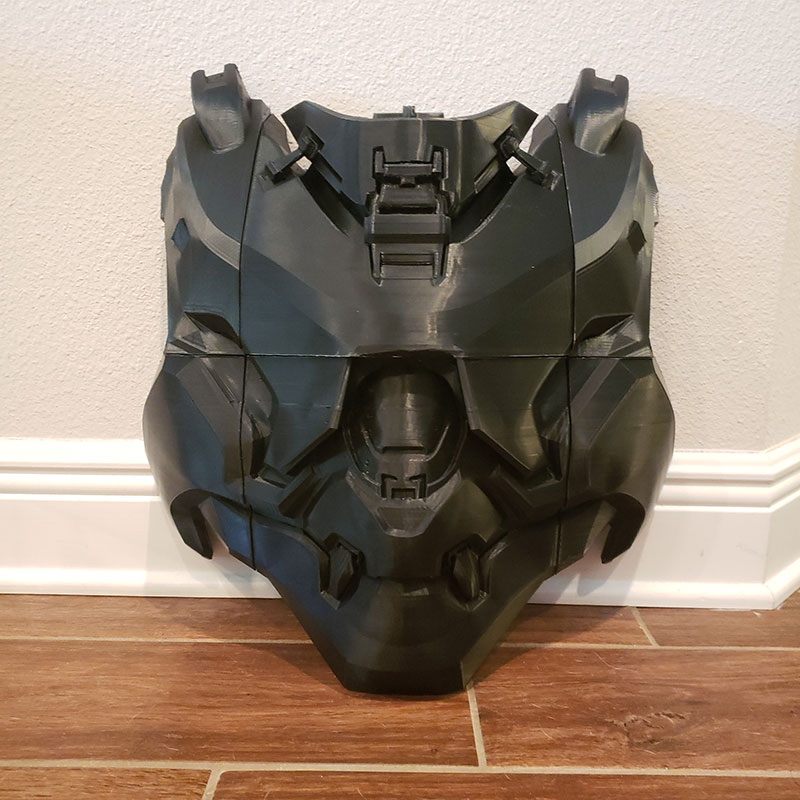
Picture 1
The first problem that we tackled was hiding the seams. This is accomplished by filling each seam with a mixture of baby powder and super glue (CA). Once the seam is filled, an accelerant is added to solidify the bond. We then sand down these seams to make the area flush. Picture 2 (Attached) shows the seams after they have been filled. And Picture 3 (attached) shows them after they have been sanded down.
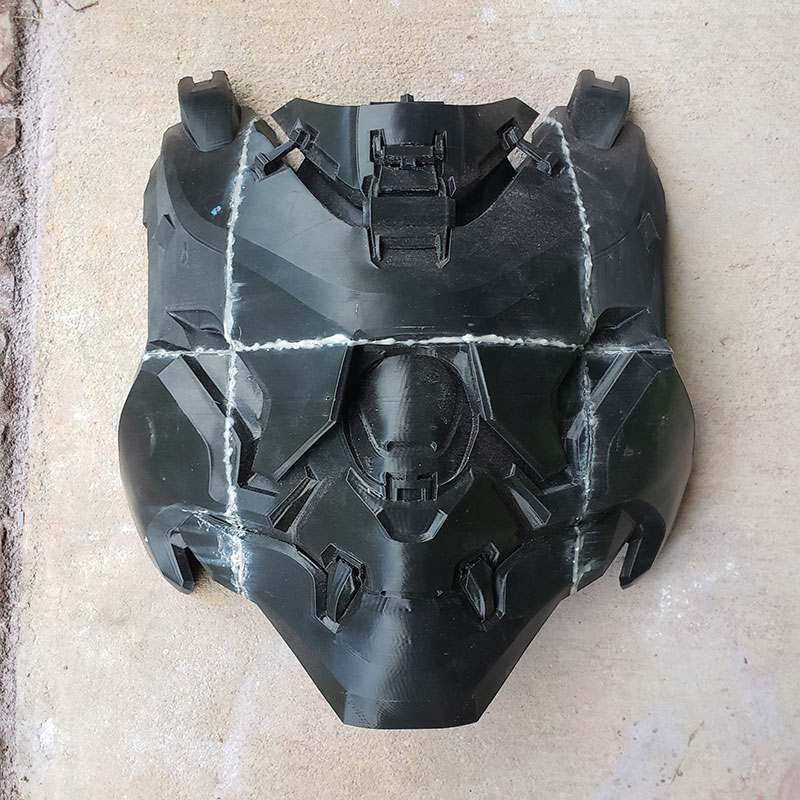
Picture 2

Picture 3
We then cover the whole piece with a product from Smooth-On called XTC3D. This is a two-part epoxy that fills a large amount of the layer lines while also adding a degree of strength. Once the epoxy has cured, we begin the extensive process of sanding. This process is three parts. First, we apply Bondo spot putty to the piece in any areas that need filling. Once it is dry, we sand the piece down with a high to medium grit sandpaper. Then, lastly, we apply filler primer to the whole piece. This process is repeated until the piece is smoothed to our satisfaction. Picture 4 (Attached) shows the piece after one of the rounds of filler primer.
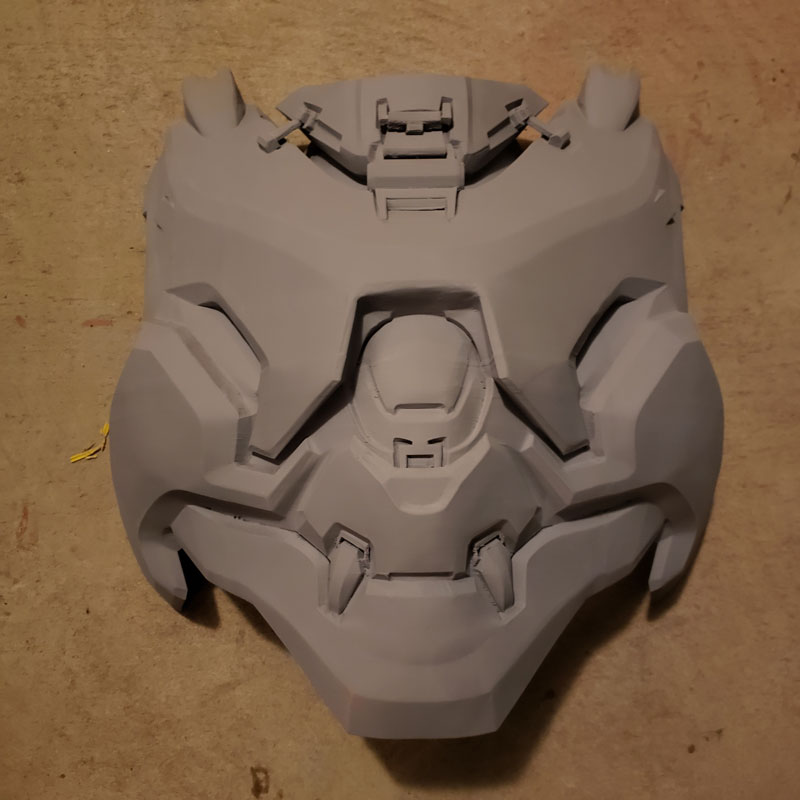
Picture 4
Once the print lines and any other imperfections are filled to our liking, we then wet sand the whole piece up to 1500 grit sandpaper. This ensures an extremely smooth surface. Once wet sanding is complete the fun really begins. Time for color. We first put down a metallic base coat on the piece. This base coat is then covered with a clear coat. This way when the main color is scrapped off the metal will show for a desired ‘weathered’ look. Picture 5 (Attached) is the piece with the basecoat applied.
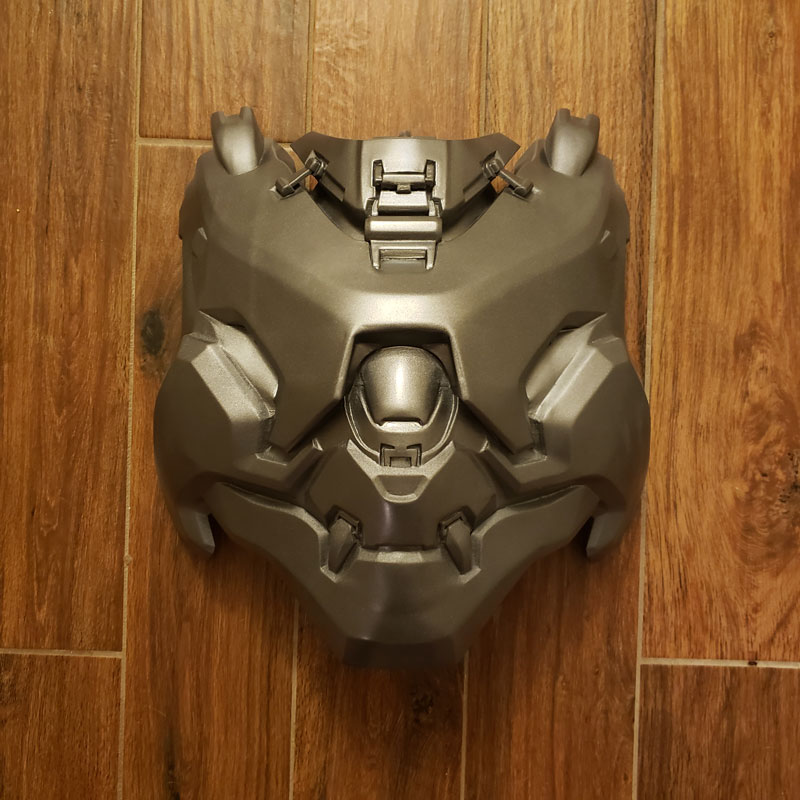
Picture 5
After this has dried completely, we then apply the base color and any other desired details. The final result is the piece ready for cosplay! Picture 6 (attached) shows the completed piece.
Picture 6
It can be a process. But our goal is to garner the smoothest finish possible on our costumes and this process has worked great for us so far. The base print quality afforded by Polylite PLA definitely makes it easier than it has been in the past. To close, if anyone is interested in costuming or if there are any questions please feel free to message us on our social media channels. Lastly, if you are interested in Halo cosplay specifically checkout the 405th.com. The 405th is a group of Halo cosplayers who have a wealth of knowledge and are happy to be of service to new members.
Thanks again!
-Anthony
Alpha to Zeta Industries
The Indiana School for the Blind and Visually Impaired (ISBVI) have embraced 3D printing to a degree exceeding all other bodies of education with 3D printed models entering the curriculum in every subject taught on campus. Three years ago, ISBVI started a 3D printing Fab Lab at the school, managed by former student Jacob Ayers.
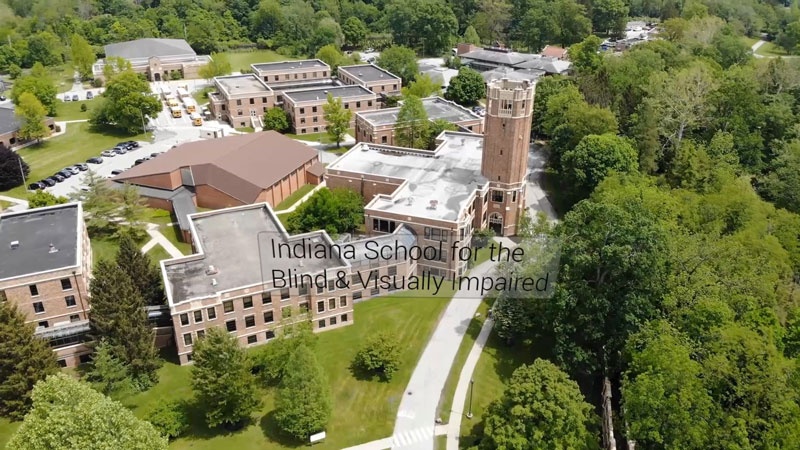
Dr. Matthew Maurer Ph.D. a professor at ISBVI instantly saw the value of 3D printing and helped Jacob to grow the 3D printing lab into a full-scale operation. With recent boosts in funding and donations, the ISBVI Fab Lab has grown from a janitor’s cupboard with Jacob operating his personal kit-built RepRap to a fully functioning print farm with over 200 3D printers in operation.
Jacob reached out to Polymaker seeking a donation of PolySmooth™ to help provide 3D printed models to the students at ISBVI. Polymaker we happy to donate five hundred pounds of PolySmooth™ 3D printing filament and 5 Polyshers to help post-process the models.
“We’ve been using PolySmooth almost exclusively for the past 2 years of the 3 years we’ve been running. We use the plastic because its: easy to print, it’s easy to post-process, it sands well, it files well compared to other plastics and its smoothable with the Polysher” – Jacob Ayers, Fab Lab Manager, ISBVI.
“When we started this project, the main aim was making models for the classroom, which is important because a lot of blind children see objects only in two dimensions, usually through raised lined drawings. When you put a 3D printed model in their hands, there is a eureka moment when everything falls into place and the subject makes sense for the students.” – Dr. Matthew Maurer, Ph.D. ISBVI
The ISBVI Fab Lab is now encouraging students to join workshops and learn about additive manufacturing as part of design & technology as well as in extracurricular activities. This allows students to gain knowledge of 3D printer operation, CAD software, and post-processing of materials.
“We see some game-changing employment possibilities and workforce development, we are very excited about the possibilities of training students in the additive manufacturing world. Students can learn from the materials and equipment that we have and then drive that knowledge into a career.” – Dr. Matthew Maurer, Ph.D. ISBVI
One project that the seniors are working on is a 3D printed face model of all the class members that are graduating this semester. In this project, the students are learning 3D scanning and file preparation, 3D printing and post-processing. The end result is a 3D printed object they can feel and touch to gain a deeper understanding of their classmate's appearance while also learning new skills.
“We can make the ultimate tactile friendly surface for someone who is blind or visually impaired. When we are creating a tactile object for classroom use, where the information being presented is vital. We don’t want to misconstrued print imperfections for detail. With the Polysher and PolySmooth, we can eliminate all of that with minimal work.” – Jacob Ayers, Fab Lab Manager ISBVI
ISBVI has also partnered with the Benjamin Harrison Presidential Site in Indianapolis, who are working on digitizing their collection of over 10,000 artifacts detailing the life and times of the 23rd President. Charles Hyde, President, and CEO of the Benjamin Harrison Presidential Site explains how digitizing museum artifacts can help educators access and utilize the collection in a compelling and engaging way. The ISBVI Fab Lab is helping print and process the artifacts to create a touch box of five selected artifacts from the Benjamin Harrison collection to give to the students at ISBVI.
“We are literally taking the collection and putting it in the hands of their students. So, we can explain what these five objects are and how they share the wider story of an American presidency.” – Charles Hyde – President & CEO Benjamin Harrison Presidential Site.
The students can then visit the home of Benjamin Harrison and experience the smells and sounds of the presidential home built-in 1874.
The Benjamin Harrison Presidential website have 3D scanned over 60 items, ranging from chairs to swords to top hats. All the OBJ files are free to download through their sketchfab collection.
Pascal Ballot, French Chef and owner of STYX is using 3D printing to customize his chic restaurant in Shanghai. Using basic shapes Pascal quickly creates a sleek looking napkin holder customized with the STYX logo. The napkin holder positions the STYX napkins so they stand up displaying the branding of the restaurant, they are printed in black PolySmooth™ and finished in the Polysher™. Pascal first prints the individual shapes then assembles the parts with IPA before polishing and sealing the whole utensil in the Polysher™.
Watch Pascal take us through the process below...
Nicolas Tokotuu, designer and creator of Nikoss Toys comes from a Pacific island called Wallis and Futuna. This small island of 10,000 inhabitants is located in the middle of the Pacific Ocean between Fiji and Samoa. Resources on the island are very limited. Although the vital resources are still coming by boat, you will never see a lot of “extra” resources imported, especially toys.
“You will not find any toys on my Island [Wallis and Futuna] or you may do but at an insane price. And that’s one of the reasons why when I discovered 3D printing last year I had the idea of creating Nikoss’ Toys.” – Nicolas Tokotuu, Nikoss Toys
Nikoss’ Toys is a brand of digital toys which will be downloadable and printable from all over the world. Starting out 6 months ago, Nicolas begun designing different series of figurines: Nikoss’ Animals, Nikoss’ Insects, Nikoss’ Dinosaurs, Nikoss’ Creatures, Nikoss’ Fish. He chose figurines as his first toys because they are the perfect accessories when children create stories. Children make the toys interact by talking, waving at each other, following each other, etc. This actually makes the child dive into their own story and helps them create their own world. 3D printing allows this world to be limitless, which means the imagination of children will be limitless. Children will not need to create their story according to the toys they have at home anymore, they will be able to imagine a whole new world everyday and print as many different toys as they want. Unfortunately, 3D printed toys so far have not been very attractive for children, especially because of the surface quality. Rough, fade and drafty are not what children are looking for.
“I love PolySmooth, it is just as easy to print as PLA and children can safely watch the printing process without being exposed to nasty fumes. Furthermore children can actually participate in the creation of their toys from downloading to the printing & polishing, truly creating an end product.” – Nicolas Tokotuu, Nikoss Toys.
Nicolas used to print his toys with ABS and PLA, then post processing the toys to make them smooth and attractive to children. But he faced a lot of problems: ABS may be the easiest to post process but if you have children at home it is not very safe to let them participate to the creation of their own toys. The fumes from the printing can be toxic, and the acetone from the polishing process can be dangerous in many ways. Moreover, the printing conditions of ABS are quiet specific. Whereas PLA is the easiest to print, you would want to keep your child away from any of the solvents used in post processing. Furthermore, the post process itself is not easy to accomplish correctly. Polymaker has solved all of these problems by creating PolySmooth and its new desktop machine the Polysher.
“I love PolySmooth, on one hand it is just as easy to print as PLA and children can safely watched the printing process without exposing them to fumes. No more hassle with ABS. On the other hand, I love this material because the support is as easy to remove as ABS. Last but not least, the Polysher allows a polishing process completely effortless and semi automated, while most importantly, much safer for children. Which means that children can actually participate in the creation of their toys from downloading to the end product.” – Nicolas Tokotuu, Nikoss Toys.
If you love Nikoss Toys as much as we do you can download all the files from Nicolas’s Thingiverse account
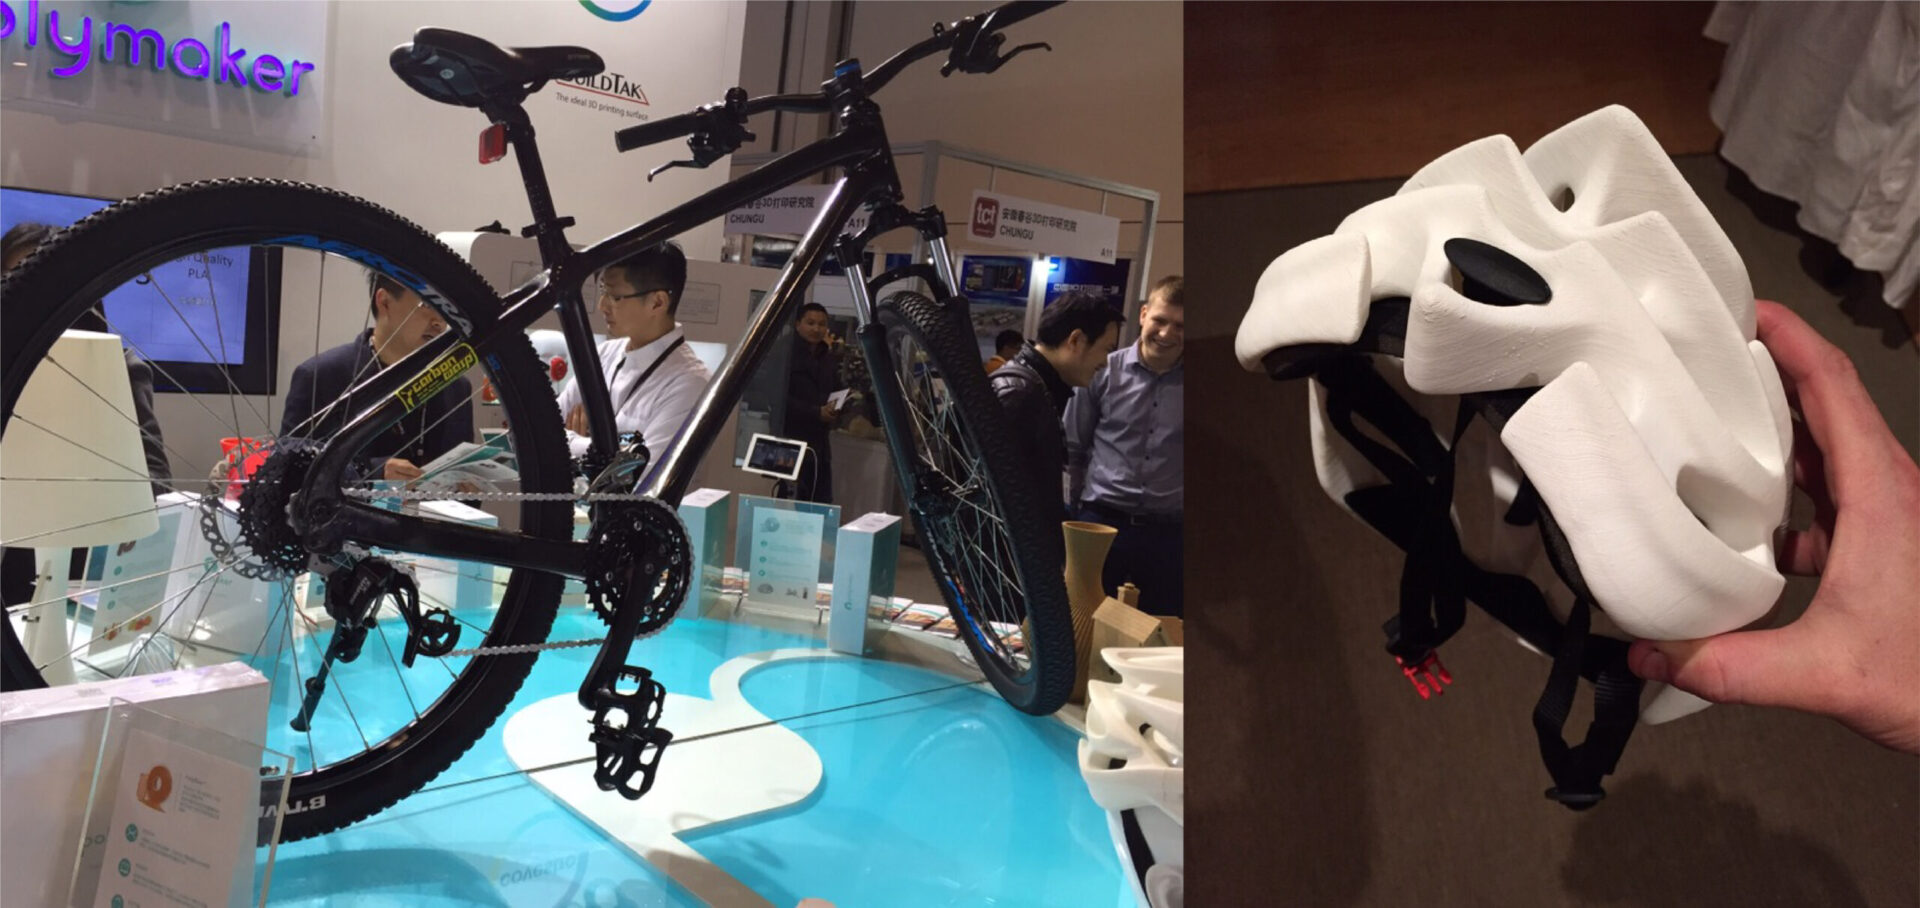
Carbon Wasp Ltd is a UK based company that designs and makes one off custom carbon fibre parts, with a focus on bicycle products. It makes custom products for individuals and while also providing prototyping and development projects for other companies and industries.
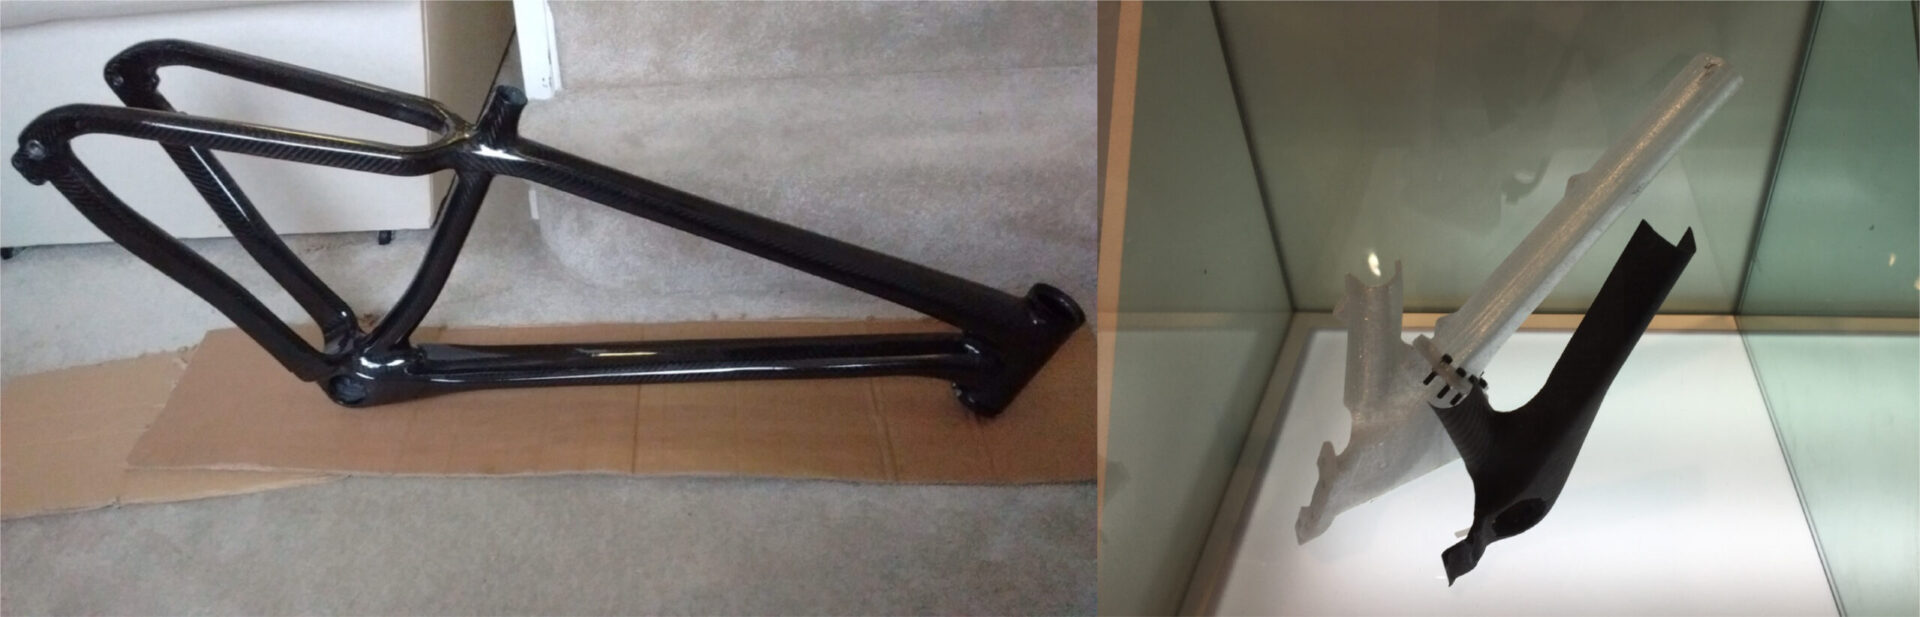
Carbon Wasp has been developing its process for several years and a key part of that is the use of 3D printed moulds. Using pre-preg carbon fibre to create their custom bike frames Carbon Wasp needed a plastic that strong enough hold up against the large internal pressures while withstanding high temperatures of up to 130℃. Polycarbonate is an obvious choice of material, but they had real difficulty finding a brand of filament that met their needs.
“We tried many different types of polycarbonate filament, from a number of manufacturers, but only PC-Plus from Polymaker provides the result we need.”
-Adam Smith
PC-Plus is strong, temperature resistant, but most importantly for Carbon Wasp it prints very well. Its moulds can be large single pieces which take many hours to print, so reliability of printing is really important. PC-Plus is easy to print, gives consistent results and doesn’t suffer most common issues with PC, such as excessive warping. Polymaker’s PC-Plus has thus become a key part of Carbon Wasp’s working process.
COMPUTATIONAL HYDROGRAPHIC PRINTING WITH POLYSMOOTH
Recently Polymaker visited Zhejiang University where professor Kun Zhou and his team in the Computer Science Department have developed an interesting new method of precisely coating 3D objects. Their process uses hydro transfer as a method of delivering a 2D printed sheet onto a 3D object. The magic behind the technology is the software developed by the team. The simulation software creates a 3D texture map between the colors on the film and the surface locations on the model. This 3D texture map is then transformed into a 2D image that you can print directly onto the PVA film. The software can predict exactly where the mask will hit the water and compensate the 2D image so that it stretches in the right places. The degree of accuracy that can be achieved with this method is astonishing. Since you need a 3D model of your object for the software to calculate the texture map, this technology seems perfectly matched to 3D printing.
Until now professor Kun Zhou has not been satisfied with the surface quality of FFF/FDM prints for his technology. The problem being the rough layered surface doesn’t take the film very well due to all the pits and falls in between layers. This forced him to shell out on an industrial SLA printer capable of matching the quality that his software can produce. However the nature of the technology is very low tech, all you need is a regular 2D inkjet printer, PVA film, a tub and a linear rail. So it seems like the extremely expensive industrial printer doesn’t match the relatively low tech nature of the coating process.
Polymaker introduced PolySmooth to professor Kun Zhou as a solution to this problem. By using PolySmooth models as a base you create a perfect clean surface for the PVA film to morph too. Professor Kun Zhou even noticed he gained more accuracy once he started using PolySmooth due to the layers being eliminated. As the software made its calculations based on parametric surfaces the extra surface area for the ups and downs of the layers was not accounted for previously. Now with PolySmooth the process can be even more refined allowing multiple immersions with incredible dimensional accuracy. Furthermore with the low cost of the Polysher & PolySmooth, this technology is available to a much wider audience, including home users and hobbyists. Allowing PolySmooth & the Polysher to take FDM/FFF printers into the league of industrial machines.
For more information on this process watch our video below